
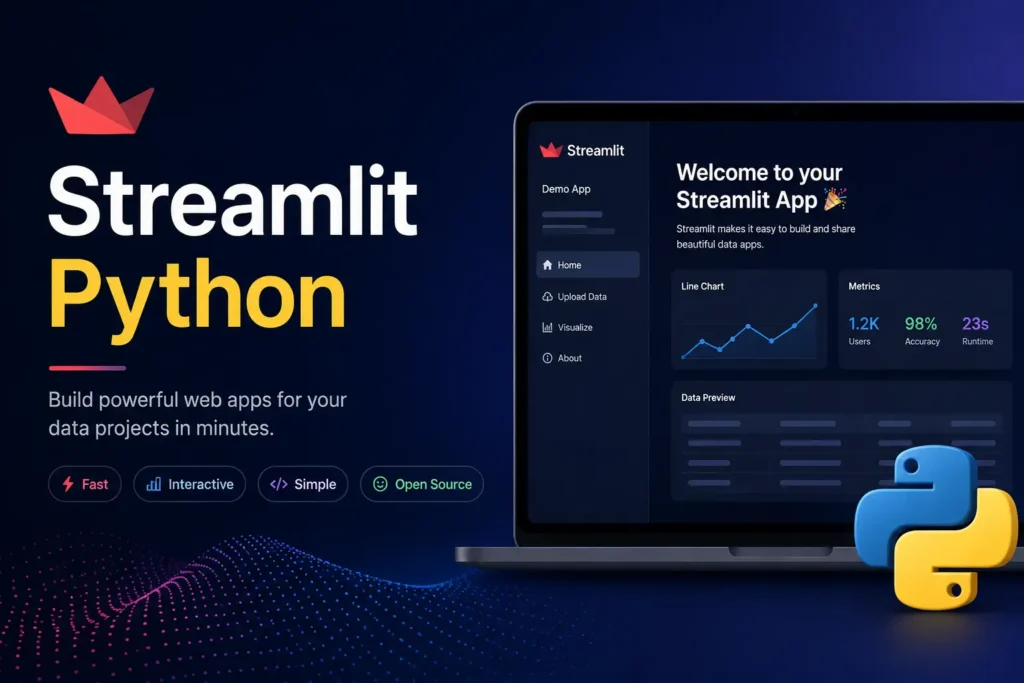
Streamlit is a free, open-source Python library that turns plain Python scripts into interactive web applications. No HTML, CSS, or JavaScript skills needed. Install it with pip install streamlit, write your app in a .py file, and run it in your browser instantly. It is widely used for data dashboards, machine learning demos, and developer testing tools. A complete beginner can build and run a working app in under 10 minutes.
You built a great Python data model. Now you want to share it with your team. The problem is, turning it into something interactive usually means learning React, hiring a frontend developer, or spending days on web frameworks you never wanted to touch.
Streamlit changes that completely.
With Streamlit Python, you can convert any Python script into a shareable, interactive web app using only the Python you already know. No frontend skills required. No complicated setup.
In this guide, you will learn exactly what Streamlit is, how to install and run it, how to build your first working app with real code, what you can create with it, and when it might not be the right tool for your project.
What Is Streamlit in Python?
Streamlit is a free, open-source Python library that converts plain Python scripts into interactive web applications. You do not need to know any HTML, CSS, or JavaScript to use it. Everything is written in pure Python.
It was created specifically for data scientists and machine learning engineers who want to share their work without learning web development. Snowflake acquired Streamlit in 2022, which has since accelerated its growth and enterprise adoption significantly.
Here is what makes Streamlit different from other Python web frameworks:
- No frontend code needed. Everything runs in Python.
- Instant browser preview. Changes appear automatically when you save your file.
- Built-in widgets. Sliders, buttons, dropdowns, and file uploaders are all one line of code.
- Free to start. The library and the basic hosting platform are completely free to use.
If you have ever wanted to share a data visualization, a machine learning model, or a simple tool with a non-technical teammate, Streamlit is one of the fastest ways to do it.
How to Install Streamlit
Before you install anything, make sure your system has Python 3.8 or higher and pip already set up. You can check by running python –version and pip –version in your terminal.
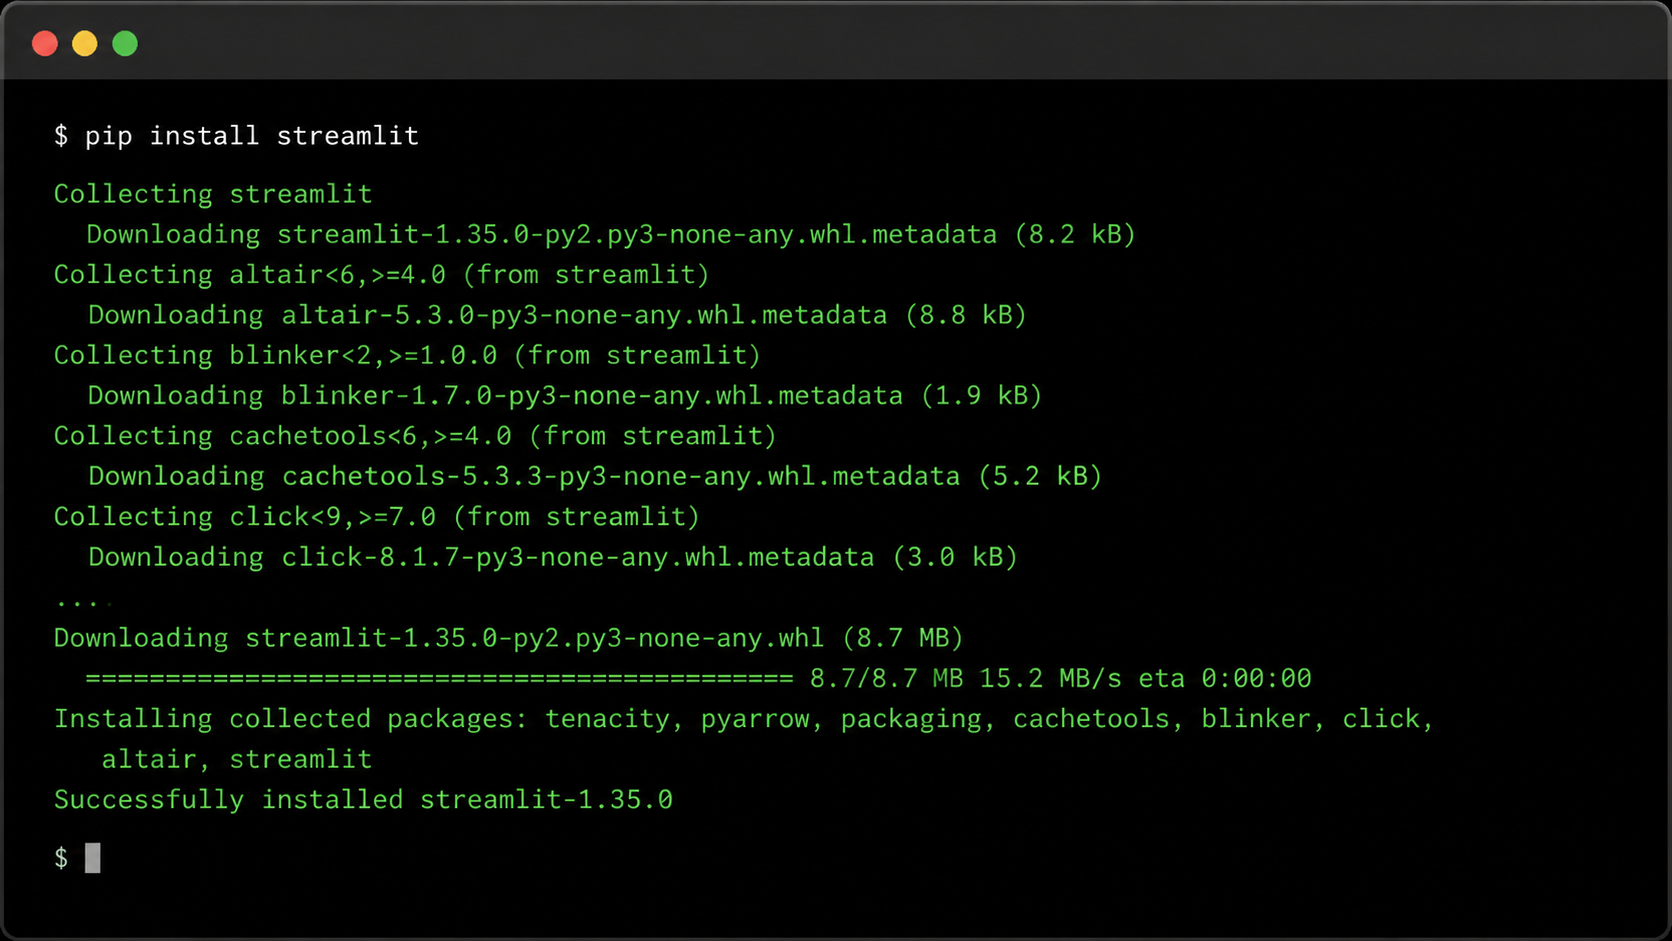
Step 1: Install the Library
Open your terminal or command prompt and run this single command:
textpip install streamlitThat is all it takes. Streamlit installs like any other Python library.
Step 2: Confirm the Installation
Once the installation finishes, run the built-in demo to confirm everything works:
textstreamlit helloYour browser will open automatically and display a Streamlit demo page. If you see that page, Streamlit is installed correctly and ready to use.
The local development server runs at http://localhost:8501 by default. You will use this address every time you test an app on your own machine.
How to Build Your First Streamlit App
Now that Streamlit is installed, let’s build a real working app. It only takes a few lines of Python.
The Code
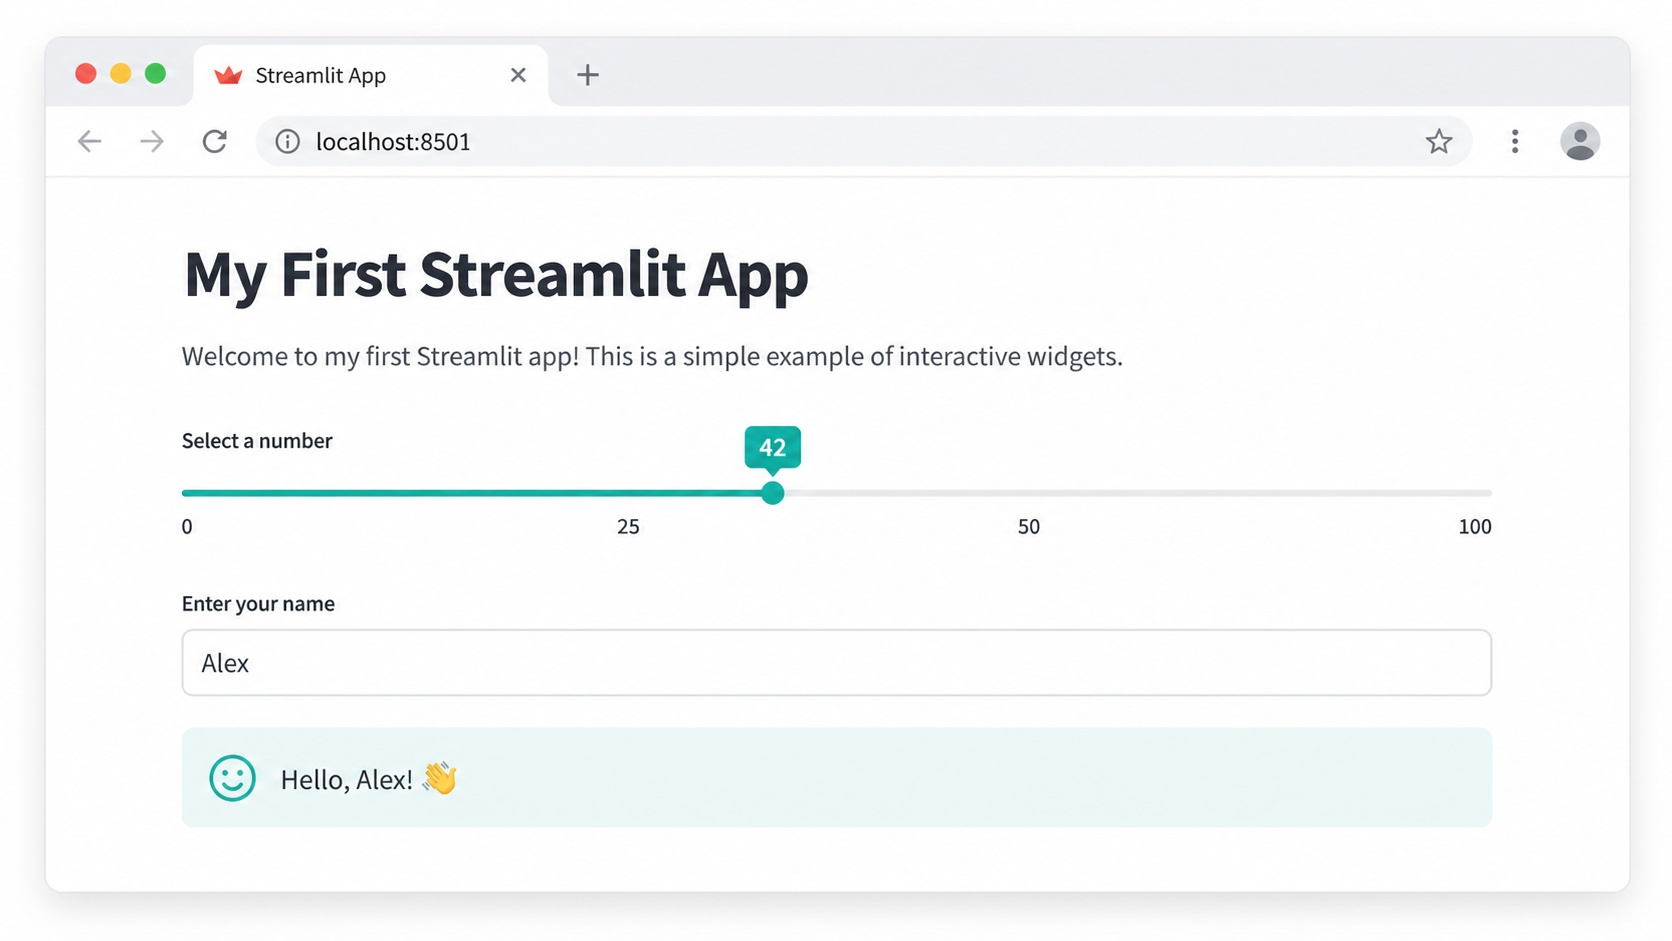
Create a new file called app.py and paste in the following code:
pythonimport streamlit as st

st.title("My First Streamlit App")
st.write("Hello! Welcome to my interactive Python web app.")

number = st.slider("Pick a number", 0, 100)
st.write(f"You selected: {number}")

name = st.text_input("Enter your name")
if name:
    st.write(f"Nice to meet you, {name}!")
Save the file, then run it from your terminal:
textstreamlit run app.pyYour browser will open the app automatically at localhost:8501.
What Each Line Does
Here is a quick breakdown so you understand what is happening:
import streamlit as stloads the library, just like importing Pandas or NumPyst.title()adds a large heading at the top of the pagest.write()displays text, data, or any Python object on the screenst.slider()creates an interactive number slider and stores the selected value in thenumbervariablest.text_input()creates a text box where users can type input- Every time a user moves the slider or types in the box, Streamlit re-runs the script and updates the output instantly
This is the magic of Streamlit. You write a Python script, and Streamlit turns every variable and output into a live, interactive interface.
What Can You Build with Streamlit?
Streamlit is not just for simple demos. In 2025 and 2026, it is being used in real production environments across many industries. Here are the most common use cases:
- Data dashboards. Visualize live data from CSV files, databases, or APIs using Pandas and Plotly charts.
- Machine learning model demos. Let users input values and see predictions from your Scikit-learn, TensorFlow, or PyTorch models in real time.
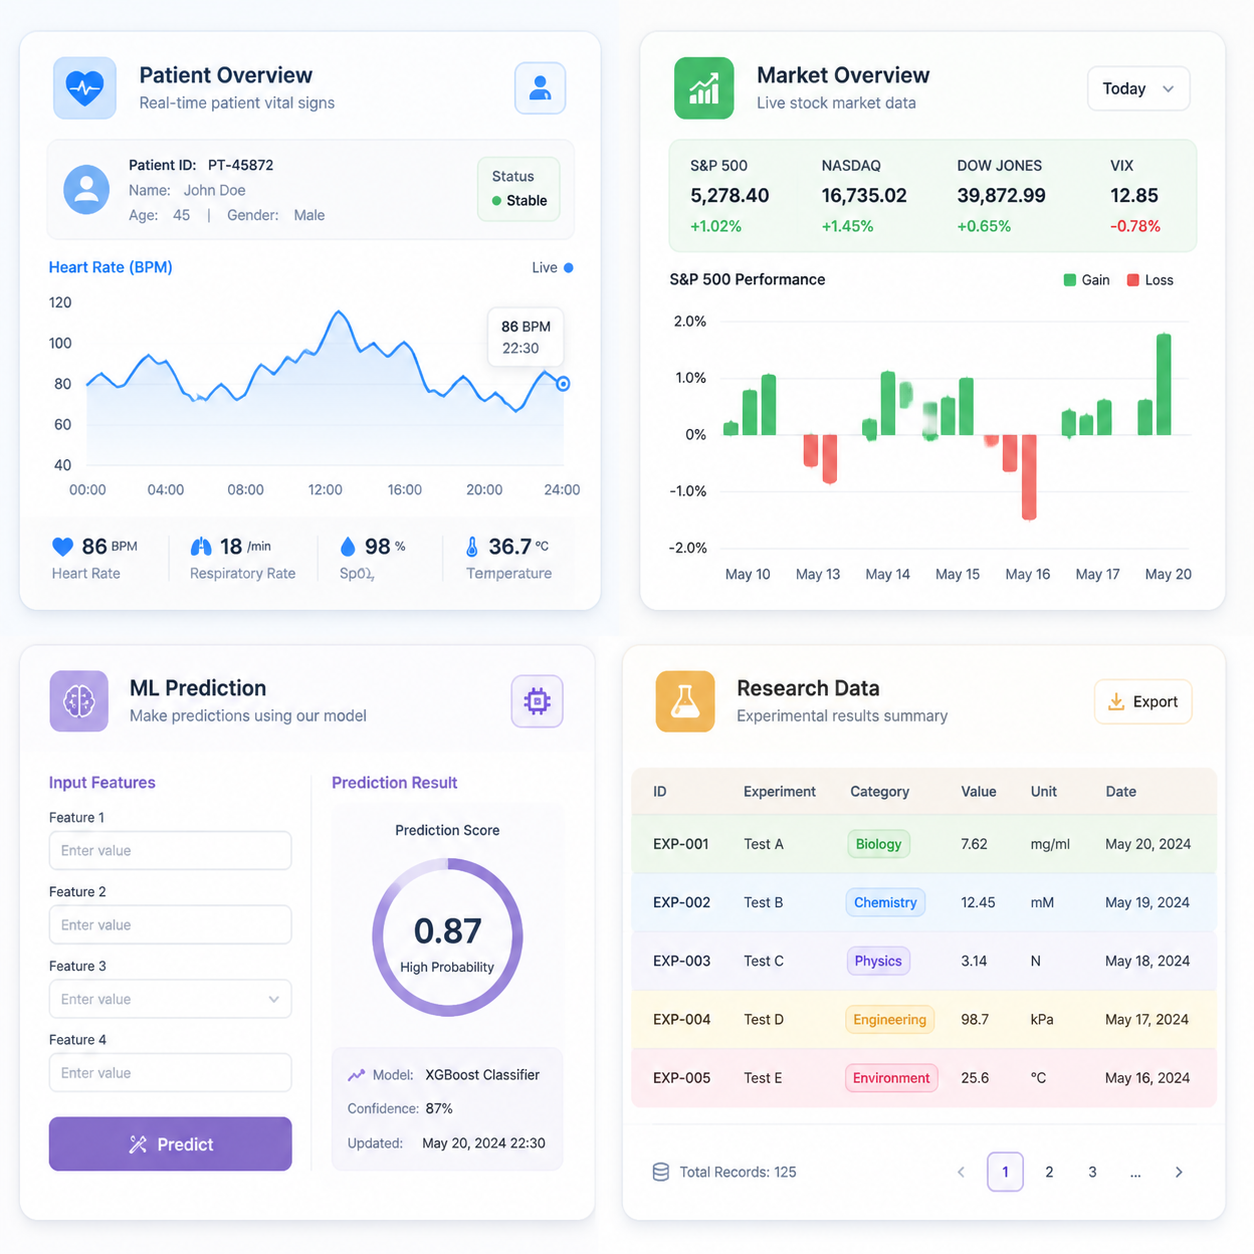
- Healthcare analytics. Hospitals and research teams use Streamlit for real-time patient data dashboards and clinical reporting tools.
- Financial analytics. Stock market trackers, portfolio analyzers, and trading signal monitors are popular Streamlit projects.
- Research tools. Scientists use Streamlit to build interactive explorers for datasets, allowing others to filter and visualize results without writing code.
- Developer and QA testing. When your Streamlit app includes an email sign-up or contact form, you need to test those email flows properly. Using a temporary email address lets you verify that confirmation emails arrive correctly without cluttering your real inbox or creating dozens of throwaway accounts.
The GitHub community has cataloged over 100 Streamlit apps across 9 categories, with projects collecting more than 17,000 combined stars. The variety of things people build is impressive.
Key Streamlit Features and Widgets
One of the best things about Streamlit is how many tools it gives you out of the box. Here is a breakdown of the main widget categories:
Display Elements
| Widget | What It Does |
| st.title() | Adds a large page title |
| st.header() | Adds a section header |
| st.markdown() | Renders Markdown-formatted text |
| st.write() | Displays almost anything: text, data, charts |
| st.code() | Shows a formatted code block |
Interactive Input Widgets
| Widget | What It Does |
| st.slider() | Number or date range slider |
| st.button() | Clickable button that triggers an action |
| st.text_input() | Single-line text entry box |
| st.selectbox() | Dropdown menu |
| st.file_uploader() | Lets users upload files directly |
| st.checkbox() | Toggle for on/off options |
Data and Chart Display
| Widget | What It Does |
| st.dataframe() | Interactive sortable data table |
| st.line_chart() | Simple line chart from a dataframe |
| st.bar_chart() | Bar chart, no extra library needed |
| st.plotly_chart() | Renders interactive Plotly visualizations |
All of these widgets work in pure Python. You do not write a single line of JavaScript.
How Does Streamlit Actually Work?
The Re-Run Model
Streamlit uses a simple but unusual execution model: every time a user interacts with a widget, it re-runs your entire Python script from top to bottom.
This makes the code easy to write. You do not need callbacks, event listeners, or state management logic. Your script just runs again with the new input values.
For small apps and quick prototypes, this works perfectly. But if your script loads a large dataset or runs a slow computation, re-running the whole script on every click becomes a problem.
Caching for Performance
Streamlit solves this with caching decorators. The @st.cache_data decorator tells Streamlit to store the result of a function and reuse it instead of re-running it every time.
Here is a practical example:
pythonimport streamlit as st
import pandas as pd

@st.cache_data
def load_data():
    return pd.read_csv("large_dataset.csv")

df = load_data()
st.dataframe(df)
With @st.cache_data in place, the CSV file loads once and gets cached. Every subsequent interaction with the app skips the file load entirely and uses the stored result.
Use @st.cache_data for data such as CSV files, API calls, and database queries. Use @st.cache_resource for shared objects like database connections or machine learning model instances.
How to Deploy a Streamlit Python App
Building an app locally is great. But if you want to share it with others, you need to deploy it somewhere accessible. The good news is that the easiest option is completely free.
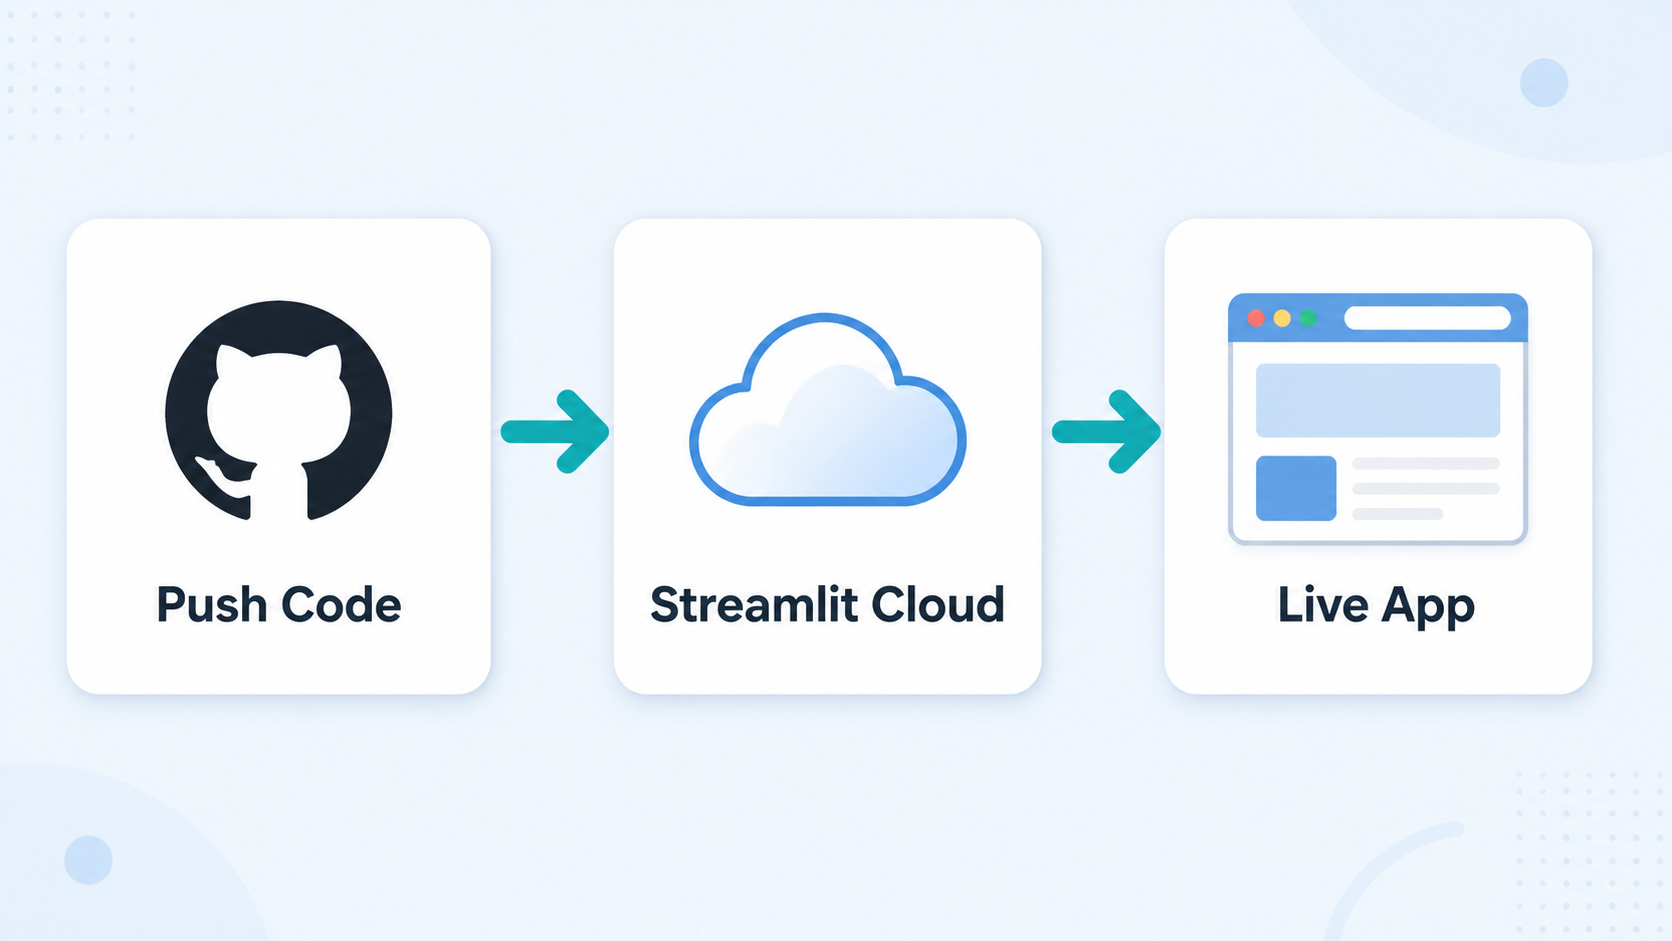
Option 1: Streamlit Community Cloud (Recommended for Beginners)
Streamlit Community Cloud is the official free hosting platform. It connects directly to your GitHub repository and deploys your app in about 5 minutes.
Here is the full process:
- Push your app.py file to a public GitHub repository
- Go to
- streamlit.io/cloud
- and sign in with your GitHub account
- Click “New app” and select your repository, branch, and file name
- Click “Deploy” and wait about one to two minutes
- Your app is now live at a public URL you can share with anyone
Any time you push an update to GitHub, Streamlit Community Cloud automatically redeploys your app.
Option 2: Other Hosting Platforms
If you need more control or resources than the free tier allows, you have several alternatives:
- Hugging Face Spaces is free and especially popular for machine learning model demos
- AWS Elastic Beanstalk works well for enterprise deployments with higher traffic
- Google Cloud Run and Heroku are solid options for containerized Streamlit apps
- Docker lets you package your app and run it on any server or cloud provider
For most beginners and small projects, Streamlit Community Cloud covers everything you need at zero cost.
When Should You NOT Use Streamlit?
Streamlit is excellent for what it was designed for. But it is not the right tool for every situation. Here is an honest look at where it falls short:
- You need complex multi-page routing. Streamlit added basic multi-page support (using a pages/ folder), but it is limited compared to full web frameworks. If you need dynamic URL routing or deeply nested navigation, Flask or FastAPI handle it far better.
- Your app requires heavy user authentication. Streamlit has no built-in authentication system. Adding login/logout flows or role-based permissions requires third-party workarounds or significant extra code.
- You expect high concurrent traffic. Streamlit’s re-run model is not optimized for hundreds of simultaneous users. Large-scale production apps with thousands of active users need a different architecture.
- You need real-time multi-user state sharing. If multiple users need to see each other’s changes in real time (like a collaborative tool), Streamlit’s architecture is not designed for that.
- You want full control over the UI. Streamlit controls your layout and styling for you. If a designer needs pixel-perfect custom interfaces, a traditional framework like Django or a React frontend gives much more flexibility.
A good rule of thumb: Streamlit is perfect for prototypes, internal tools, demos, and data apps with a small to medium audience. For large-scale production web apps, consider Dash, Flask, or FastAPI instead.
Start Building with Streamlit Today
Streamlit is one of the most beginner-friendly tools in the Python data science ecosystem. You can go from zero to a working, shareable web app in under 10 minutes, using only Python you already know.
Here is a quick recap of what you learned in this guide:
- Streamlit is a free, open-source Python library for building interactive data apps
- Install it with pip install streamlit and run apps with streamlit run app.py
- Widgets like sliders, buttons, and dropdowns require just one line of Python
- Use @st.cache_data to prevent performance problems when working with large datasets
- Deploy for free in 5 minutes using Streamlit Community Cloud and GitHub
- Streamlit is best for dashboards, ML demos, and internal tools; less suitable for high-traffic or complex production apps
If your Streamlit app includes any kind of email sign-up form, contact form, or newsletter subscription, make sure you test that email workflow before going live. The fastest way to do it is to use a free temporary email address to generate test inboxes instantly, verify that confirmation emails land correctly, and check your form logic without using your real email address at all. It takes seconds and keeps your real inbox clean throughout development.
Now open your terminal, run pip install streamlit, and build something useful.