

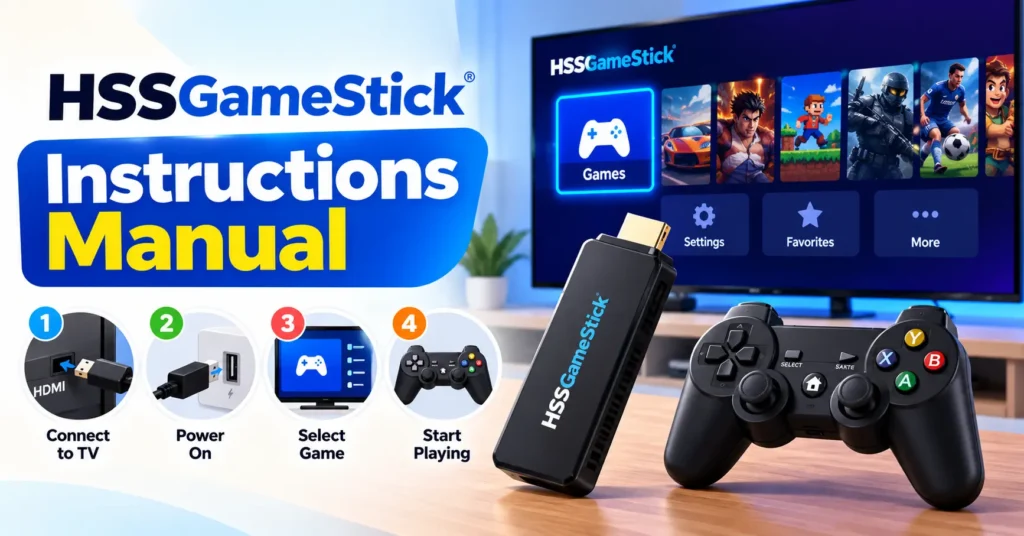
The HSSGameStick is a plug-and-play retro gaming console that connects to any HDMI television. Plug the stick into your TV’s HDMI port, power it with a 5V/1A wall adapter, insert the wireless dongle, turn on the controller, and switch your TV to the right HDMI input. For the best picture, set display output to 1080p, choose a 4:3 aspect ratio, and turn off V-Sync to cut down on input lag.
The box arrived. You ripped it open. You found the HSSGameStick, two wireless controllers, a USB cable, and a small card with a few basic pictures on it. What you did not find was a real manual.
That tiny card tells you almost nothing. It skips the tricky parts. It does not explain why your controller keeps cutting out, or why some games look stretched on your TV, or how to save your progress mid-game. This guide covers all of that.
This instructions manual for the HSSGameStick walks you through every step, from plugging it in for the first time to fixing the most common problems. You will also learn how to adjust the manual settings on the HSSGameStick to get the best picture and the sharpest controls for your setup.
What Is the HSSGameStick and What Comes in the Box?
The HSSGameStick is a retro gaming console about the size of a large USB drive. It plugs directly into any TV with an HDMI port. Once connected, it gives you access to a pre-loaded ROM library of 10,000 to 20,000 classic games from platforms like NES, SNES, Sega Genesis, PlayStation 1, Game Boy Advance, and MAME arcade titles.
It runs on open-source emulation software called EmuELEC. You do not need to download anything or connect to the internet to play.
Your package should include:
- The HSSGameStick device itself
- One HDMI extension cable
- One USB power cable
- Two 2.4GHz wireless controllers
- One USB wireless dongle (sometimes two, one per controller)
- A MicroSD card (already installed in the stick)
- A quick-start card
How Do I Connect the HSSGameStick to My TV?
Plug the HSSGameStick into your TV’s HDMI port. Connect the USB power cable to the stick and plug the other end into a 5V/1A wall adapter. Switch your TV input to the matching HDMI source.
Here is the full connection process step by step:
- Find an open HDMI port on your TV.
- Insert the HSSGameStick into that port. If it does not fit easily because the TV is close to a wall, use the HDMI extension cable first.
- Connect the USB power cable to the port on the HSSGameStick.
- Plug the other end of the USB cable into a 5V/1A wall adapter, not your TV’s built-in USB port.
- Turn on your TV and press the Input or Source button on your remote.
- Select the HDMI source you plugged the stick into.
- You should see a loading screen appear within a few seconds.
A stable power supply makes a big difference. TV USB ports often output less than 5V/1A. When the stick does not get enough power, games freeze or the system crashes mid-session.
Why You Should Always Use the HDMI Extension Cable
Most people skip the HDMI extension cable. That is a mistake.
When you plug the HSSGameStick directly into a wall-mounted TV, the stick bends slightly under its own weight. Over time, that bends the HDMI connector and can cause signal issues.
The bigger reason to use the cable is wireless performance. The USB wireless dongle inside the HSSGameStick uses a 2.4GHz signal to talk to your controllers. Your TV’s internal electronics run on frequencies that interfere with that 2.4GHz signal. When the stick is pressed right against the back of the TV, the signal gets disrupted. This shows up as controller lag, button drops, or a controller that keeps cutting out.
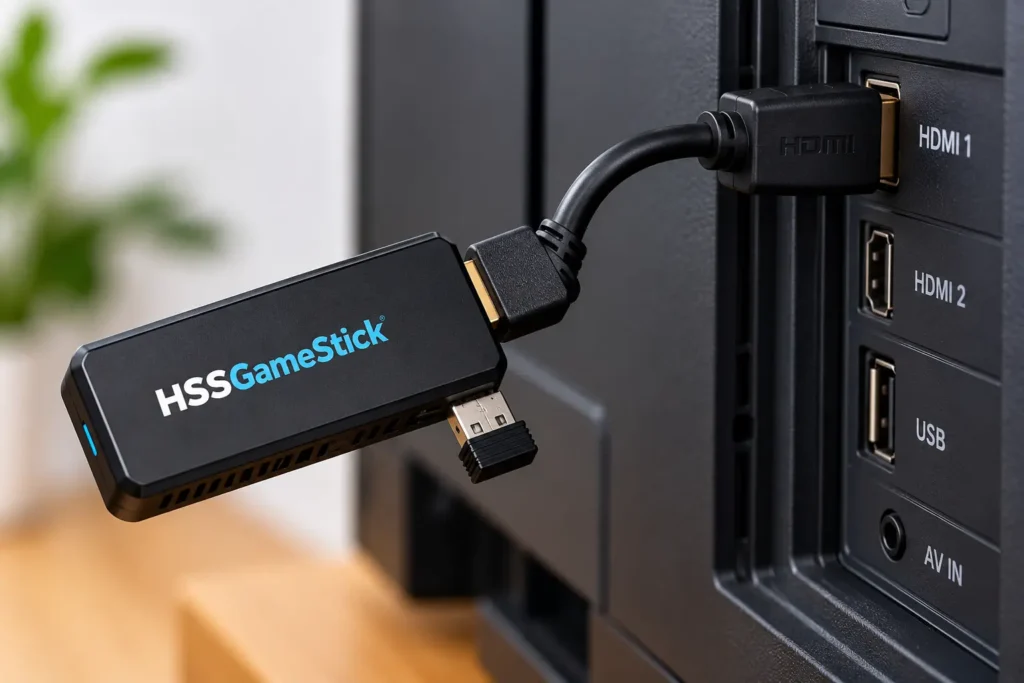
The HDMI extension cable moves the stick a few inches away from the TV. That small gap separates the wireless dongle from the TV’s electronics. Controller response gets noticeably better. This is the fix that most how to use hssgamestick guides skip entirely, but it solves a lot of frustration fast.
How Do I Sync and Set Up the Wireless Controllers?
Insert the USB wireless dongle into the back port of the HSSGameStick. Insert batteries into the controller and flip the power switch on the controller to “On.” The indicator light on the controller will flash and then go solid once the connection locks in.
If the controller does not connect on the first try:
- Remove the dongle from the stick.
- Wait five seconds.
- Reinsert the dongle firmly.
- Turn the controller off, then back on.
The connection should lock in within a few seconds.
A few tips that help keep the 2.4GHz wireless controller connected:
- Keep the HSSGameStick away from your Wi-Fi router. Both devices use the 2.4GHz band. When they sit close together, they fight for the same signal space, and your controller loses.
- Do not place the stick near a microwave oven. Microwaves also interfere with 2.4GHz signals when running.
- If both controllers stop responding at the same time, pull the dongle out and put it back in. That refreshes the connection without restarting the whole system.
Fresh batteries matter more than most people expect. Wireless controller problems drop by a lot when you swap in new batteries before a long session.
How Do I Adjust Display Settings on the HSSGameStick?
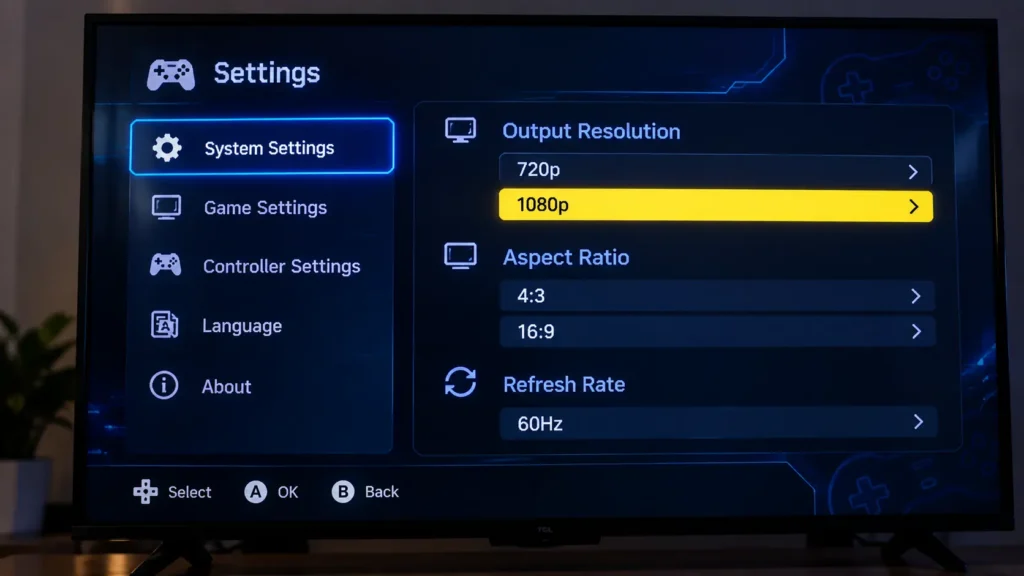
Press the Start button on the main game screen to open System Settings. Go to Display Settings to change the output resolution and aspect ratio. Start with 1080p and 4:3 aspect ratio for most setups.
The manual settings on the HSSGameStick give you control over how games look and feel. Display calibration is one of the most useful things to set up early. The default settings are not always right for your specific TV.
720p vs. 1080p: Which Should You Choose?
Both options work, but they feel different depending on your TV.
1080p gives you a sharper, cleaner picture on modern televisions. If your TV is from 2015 or newer, start here. There is a small chance menus will feel slightly slower on very old LCD panels, but for most people, 1080p is the better pick.
720p puts less load on the HSSGameStick hardware. If your TV was made before 2012, or if the main menu feels slow after you switch to 1080p, drop back down to 720p. Games will still look good.
To change the setting, go to Settings, then Display Settings, then Output Resolution.
Aspect Ratio: 4:3 Retro vs. 16:9 Widescreen
This one comes down to how you want the games to look.
4:3 aspect ratio shows the game the way it was originally designed. You will see black bars on the left and right sides of your TV. The image looks accurate and natural.
16:9 widescreen stretches the image to fill a modern TV screen. Some people prefer this for a more cinematic feel. The trade-off is that characters and objects get slightly wider than they were meant to look.
Start with 4:3. You can always switch to 16:9 if the black bars bother you.
Set your refresh rate to 60Hz if that option appears. This cuts down on screen tearing during fast movement.
How Do I Remap Buttons and Customize Controls?
Press Start on the main screen to open Global Control Settings. Set your button layout and sensitivity there, and every game you open will use those settings. For per-game changes, press Select plus Start during gameplay to open the Quick Menu, then go to Controls.
Button remapping is where this console gets a lot more useful. Here is how the two options work:
Global Mapping applies your button layout to every game across every emulator. This is good for basic controls that feel the same no matter what you play. Set it once and leave it.
Per-Emulator Mapping gives you a different layout for each gaming platform. This matters because NES games mostly use a d-pad and two buttons, but PlayStation 1 games need two analog sticks and four shoulder buttons. If you switch between those systems often, give each one its own control layout. To do this, open the Quick Menu during gameplay by pressing Select plus Start at the same time, go to Controls, and adjust from there.
For the sensitivity settings, look for Deadzone and Analog Sensitivity in the Advanced Stick Settings menu. If your character drifts without you touching the stick, increase the deadzone slightly. If aiming or moving feels too slow, raise the analog sensitivity.
Turning off V-Sync also reduces input lag. Find this in the Video Settings menu. V-Sync helps with screen tearing on some setups, but it adds a small delay between your button press and what happens on screen. For most retro games, turning it off makes the controls feel faster and more responsive.
HSSGameStick Hotkey Shortcuts: The Complete Reference Table
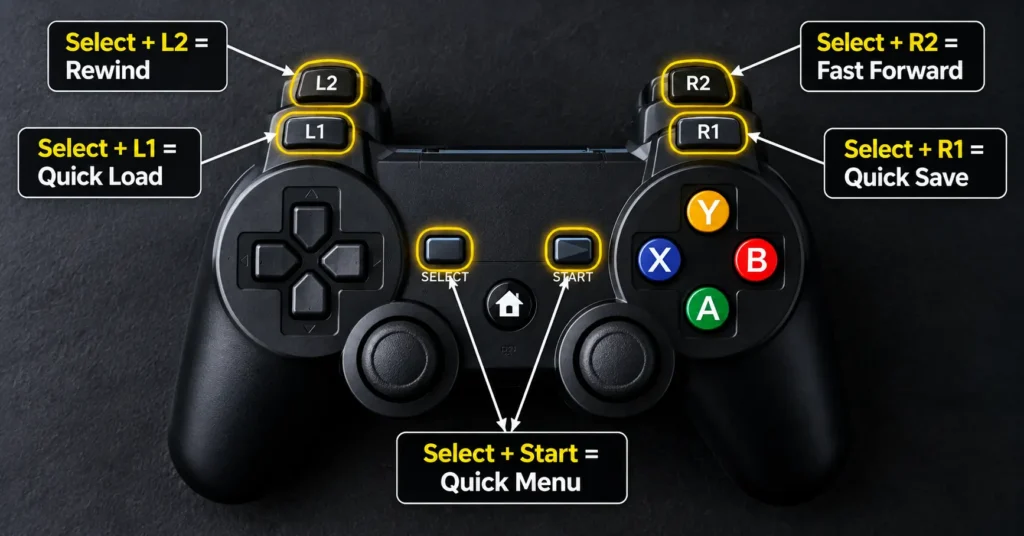
The HSSGameStick uses RetroArch-style shortcut combinations. Once you know these six combinations, you will not need to exit to the main menu during a gaming session.
| Action | Button Combination |
| Quick Save (Save State) | Select + R1 |
| Quick Load (Load State) | Select + L1 |
| Open Quick Menu | Select + Start |
| Exit Game, Return to Menu | Select + Start (hold or press twice) |
| Rewind (if enabled) | Select + L2 |
| Fast Forward | Select + R2 |
Save states are the most useful feature on the entire device. Press Select plus R1 at any moment during a game and your exact progress gets saved, including your position, health, and inventory. It does not matter whether the original game had a save system. You can come back tomorrow and load right back to that spot using Select plus L1.
This is the hssgamestick save game hotkey that most new users do not know about. The physical quick-start card never mentions it.
How Do I Manage and Organize My Game Library?
Press R2 or the Collect button on any game title to add it to your Favorites tab. Use the Search function (press Start or Select on the main screen) to find specific games by name. You can also set up separate user profiles for different players.
Scrolling through 10,000 or 20,000 games is not a good experience. Building a personal Favorites list fixes that problem quickly.
Here is how to get organized:
- Add to Favorites: Highlight any game and press R2 or the Collect button. The game gets added to a Collected or Favorites tab that you can open directly from the main screen.
- Search for a game: Press Start or Select on the main game list to open the search keyboard. Type the name of the game you want. This works much faster than scrolling for anything specific.
- Create user profiles: Most HSSGameStick models let you set up four to five separate profiles on one device. Each profile holds its own Favorites list and controller settings. Go to System Settings to find the profile option. This is great for households where more than one person uses the same device.
Can I Add More Games to the HSSGameStick?
Yes. Remove the MicroSD card from the HSSGameStick, connect it to a PC, and copy ROM files into the correct emulator folders. You need a free tool to do this because of the file system the card uses.
This is where the hssgamestick add games microsd process gets a little technical, but it is manageable.
Why You Need Special Software for the MicroSD Card
The MicroSD card inside the HSSGameStick uses a file format called EXT2. This is a Linux file system. Windows computers cannot read or write to EXT2 cards without extra software. If you put the card into your PC and Windows says it cannot open it or asks you to format it, do not format it. Formatting will erase everything.
You need a free tool such as DiskGenius or Ext2Fsd. Both are widely available through a quick web search and let Windows read and write to EXT2 cards without erasing any data.
Once you can access the card, follow these steps:
- Remove the MicroSD card from the HSSGameStick. Make sure the system is fully off before you remove it.
- Connect the card to your PC using a card reader.
- Open DiskGenius or Ext2Fsd to access the card.
- Find the folder that matches the gaming platform for your ROM. NES games go in the NES folder, PlayStation 1 games go in the PS1 folder, and so on.
- Copy your ROM files into the correct folder.
- Use the safe eject option in your PC software before physically removing the card.
- Reinsert the card into the HSSGameStick.
Back up the MicroSD card before you do anything. Copy all the existing files to a folder on your PC first. If something goes wrong, you can restore everything. Removing the card while the system is still on is the top cause of data corruption on these devices. If the card is not recognized after reinserting it, the troubleshooting table has the repair steps.
HSSGameStick Not Working? Troubleshooting Guide
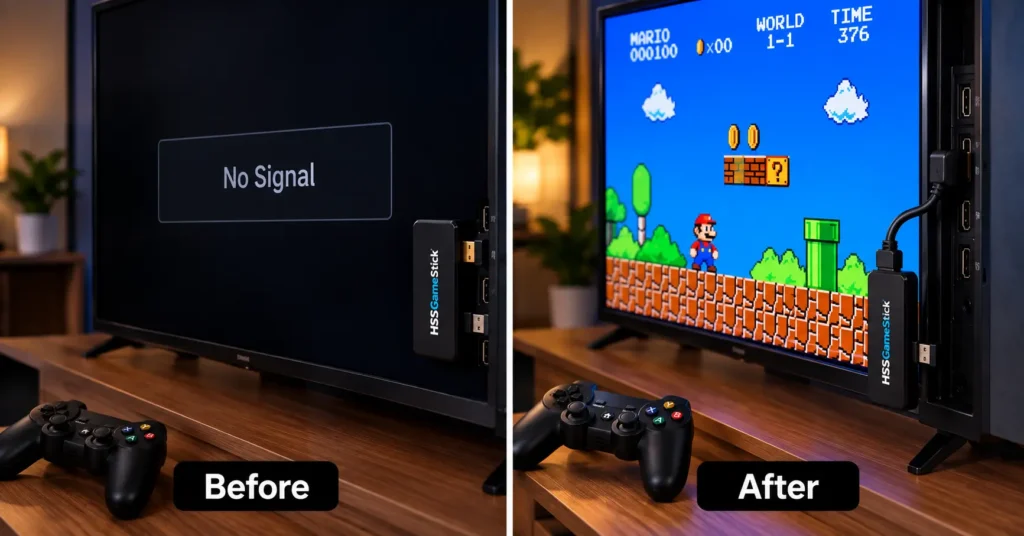
Most problems with the HSSGameStick come down to three things: not enough power, wireless interference, or the wrong emulator core for a specific game. The table below covers the most common issues and how to fix each one.
| Problem | Most Likely Cause | Fix |
| Black screen, no signal | USB power from TV port instead of wall adapter | Switch to a 5V/1A wall adapter. Reseat the HDMI connection. |
| Controller lag or button drops | 2.4GHz interference from nearby Wi-Fi router | Use the HDMI extension cable to move the stick away from the TV. Move stick away from your router. |
| Controller will not connect | Low batteries or loose dongle | Replace batteries. Remove dongle, wait 5 seconds, reinsert. |
| Game will not load or shows green screen | Wrong emulator core selected | Open Quick Menu during game launch. Go to Emulator Settings. Try a different core. |
| System crashes during gameplay | Not enough power, or overheating | Use wall adapter for power. Use HDMI extension cable to allow air around the stick. |
| MicroSD card not recognized | Partition corruption from improper ejection | Use DiskGenius to repair the partition. Do not format the card. |
| Audio out of sync with video | High audio latency setting | Go to Settings, then Audio, then lower the Audio Latency value. |
| Image looks stretched on TV | Wrong aspect ratio setting | Go to Settings, then Display, then set Aspect Ratio to 4:3. |
For the hssgamestick black screen fix, always check the power source first. It solves the problem about 70 percent of the time.
If a specific game refuses to load or crashes every time, switching the emulator core usually fixes it. The HSSGameStick runs multiple cores for each gaming platform, like SNES9x for SNES games or MAME for arcade titles. Some ROM files run better on one core than another. To switch, press Select plus Start to open the Quick Menu while the game is loading, then go to Emulator Settings.
If there is visible physical damage to the stick or the HDMI connector, contact your seller directly. Warranty terms vary by where you purchased the device.
How to Keep Your HSSGameStick in Good Condition
A few simple habits will keep the device running well for years.
Use a quality USB wall adapter every time. Avoid borrowing chargers from old phones or tablets that output lower than 5V/1A. Keep the ventilation slots on the stick clear. Do not block them with cases or covers during play. Handle the MicroSD card carefully and always eject it properly from your PC before pulling it out physically. Keep fresh batteries on hand for the 2.4GHz wireless controllers. Performance drops noticeably when batteries get below half capacity.
If a firmware update prompt appears on screen, let it install before you start playing. Updates fix bugs and improve how games run. They only take a few minutes.
Frequently Asked Questions
Can I use the HSSGameStick with a projector?
Yes. The HSSGameStick works with any display that accepts an HDMI input, and that includes most projectors. Connect it the same way you would with a TV. Plug the stick into the HDMI port on the projector, power it via USB, and select the correct HDMI source on the projector. Make sure the projector is set to 720p or 1080p input for the best results.
Does the HSSGameStick need an internet connection?
No. The HSSGameStick is fully offline. All games are stored on the MicroSD card that comes with the device. You do not need Wi-Fi or a data connection to play. Firmware updates, when available, are typically applied by downloading a file to the MicroSD card from a PC, not through wireless updates.
Why does my HSSGameStick keep crashing?
The most common cause is not enough power through the USB cable. Switch to a 5V/1A wall adapter instead of plugging into the TV’s USB port. Overheating is the second most common cause. Use the HDMI extension cable to give the stick some space away from the back of the TV so heat can escape. Both fixes are covered in the troubleshooting guide above.
How do I change the language on my HSSGameStick?
Press Start on the main screen to open System Settings. Find Language Settings and pick the language you want. The change takes effect right away without needing a restart. Most models support English, Spanish, French, German, and Chinese.
How many games does the HSSGameStick have?
Most models come with 10,000 to 20,000 pre-loaded classic game titles, depending on the version and the size of the MicroSD card included. Games cover multiple platforms including NES, SNES, Sega Genesis, MAME arcade, PlayStation 1, and Game Boy Advance. You can also add your own ROM files once you have access to the MicroSD card.
Can I create separate profiles on the HSSGameStick for different players?
Yes. Most models let you create four to five separate user profiles on a single device. Each profile keeps its own Favorites list and control settings. You will find the profile option inside System Settings from the main menu. This makes it easy for multiple people in the same household to keep their game libraries separate.
What should I do if the HSSGameStick controller stops responding mid-game?
Check the battery level first. Low batteries are behind most mid-game dropouts. If the batteries are fine, remove the wireless dongle from the back of the HSSGameStick, wait five seconds, and plug it back in. That refreshes the 2.4GHz wireless connection without restarting the whole system. The controller should reconnect within a few seconds. For more controller fixes, refer back to the controller sync section above.
If you want more tech guides like this one, sign up for the newsletter at FreeMail AI and get useful tips sent straight to your inbox.